Showing posts with label APP Words. Show all posts

Wednesday, 22 January 2014

Never Give In & Never Give Up

The Brief 
The aim is to design the outer design of a travel mug using inspirational words integrating illustration where possible. We often look upon inspirational quotes to boost our motivation to get us through the week long of reports or essays we have in our workplace and yet they can even go to the lengths of providing us with the courage to pursue our life long dreams.

Background Information
I decided to go along with the idea of hand-lettering, as it was something that I haven't yet been able to experiment with in my previous projects. This grew out of my fascination with the works of Steve Simpson and Linzie Hunter, who were both key inspirations for this project.

The Design
Done in both Adobe Illustrator and Photoshop. I produced a tea-leaves pattern for the background to create a connection between the design and Twinings, a British-based tea company, and emphasised this through the use of a teapot and cup in the illustration. My colour palette choice is linked to soothing emotions with the red to give a vibrant appearance as well as that energy boost.


Important Notice:
Please note that Twinings did not in any way commission me to produce this piece, this is completely for university purposes only as I had to pick my ideal client to base this project on.


Digital Design


Thanks for viewing! Please visit my other accounts:

Friday, 10 January 2014

APP Words: Evaluation

General Thoughts - Research etc
I am pleased to say that this was one of my most enjoyable projects I've done throughout this year and both of the HND years. I am so glad that I went along with the idea of trying out hand-lettering, or I would've never have known how much I enjoyed it.

I think that it was enjoyable because I was able to mix together both typography through hand-lettering and illustration without feeling that it was 'too' illustrative. I had to take composition into account, but it was much easier to do than my London piece. 
Another thing was that I could embrace my 'inner-child' as I returned to doing little doodles no matter how anatomically incorrect things were, because it was acceptable. I came to terms with my imperfect drawings instead of being bogged down trying to make them before, producing a series of fun and quirky illustrations. 

This was inspired by the likes of Steve Simpson and Linzie Hunter, both of whose works I continuously looked over at. They have shown my that making mistakes or including a certain sketchiness isn't altogether bad. However I wish I did try more type styles such as Blackletter, but as I wanted to aim for that 'fun' appearance I didn't think it was appropriate. Maybe next time!

I think that this was the first time where I didn't force myself to analyse so many illustrators and illustrations, only analysing what I found inspirational. This is because everything I found interesting was placed on my Pinterest boards, and it was a great way to create mood boards. I could easily go there from my phone and just flick through my collection. I cannot explain how good Pinterest is! I'll definitely use it a lot more in future projects. 

I can't actually think of what made this project un-enjoyable because even the printing process - which is normally my downfall - went well as well as prototyping. By opening my eyes and using the resources around me I was able to produce a sufficient template almost immediately.

Speaking of resources, I have to say that in this project I asked for opinions on my designs and listened to them, trying to figure out why my target market liked one thing more than another. I was able to use that information to make my own decisions and chose what would be best for both my 'client' and for my target market. After all, they would be the ones I'll be 'selling' my designs to, so it is important that I pleased both parties.
I found it easier to base my design around an existing company, and I'm hoping to send them my designs once I've done taking photos in a studio. 

I spent a lot of time during this project having a look at videos, and I've discovered that there are the perfect way to get inspiration. By watching people actually doing some hand-lettering shows me that anyone could do it with practice, so I didn't feel too upset when I didn't get perfect results on my first try. Even though I didn't analyse videos in great detail I still found them inspirational and included them within my blog. 

My Final Design
My final design was... Unexpected. From the very start of my project I knew that I'd do hand-lettering but I thought I'd go down the calligraphy route, not the funky sans serif one, and I'm actually quite glad I did in the end. If I had used calligraphy then the design would appear all too feminine - an aspect that my audience had also pointed out - and I wouldn't be able to portray the light and funny side of tea. Tea could grant the student that energy they need, but is also good for calming down, so I aimed to create a design that reflects that.

I did this by choosing a colour palette that would link with those emotions. Green is known to represent harmony and tranquility, and I've chosen a shade relatively close to blue to emphasise the 'calm' emotion, and orange provides that burst of happiness with the cream to bring the boldness down a notch. 

I made sure that the forms were as smooth as possible to reflect the smooth flow of tea from a teapot as well as that soothing effect it could have. My main focus was on the banner so I included more shading and lighting to it to bring it out.

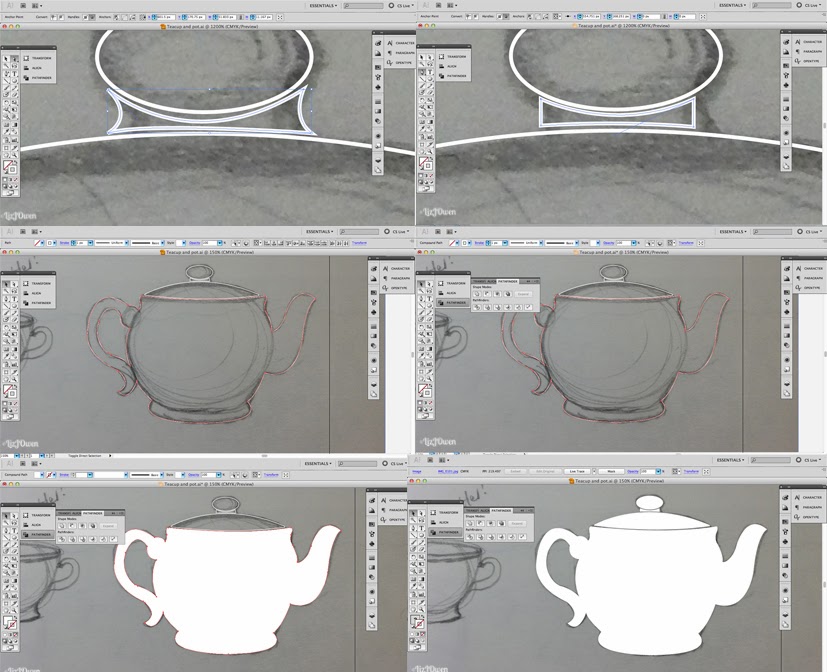
My illustration was mainly formed on Illustrator, and this in itself is surprising. I've always told myself to avoid Illustrator at all costs because of my lack of experience with it, but this project has made me come to terms with it and I can say that I'll happily work with vectors again. I have learnt so many functions and techniques, which made the process much easier later on when I had to repeat certain things over again. Repetition really is the best way to learn. 

My illustration as a whole is successful in that there is a clear relation to tea, and to Twinings. I wanted to make my Twinings label more 3D and 'realistic' than the others as if it was the real deal, and I referenced from one of their existing designs to emphasise this. Of course, I couldn't be photo-realistic, but the vector was good enough.
"Never Give In and Never Give Up" was the perfect quote choice (if I must say so myself) because it's short. This means that it was much easier to work with because I didn't have to think of the style of lots of letters, and it'll be easier to read at a glance. I didn't include any credits of the author because it wasn't a very popular one, although I'll be sure to credit them when I upload my final design onto all of my online profiles and Behance.
I chose to do a teapot and cup because it was extremely 'British' and provided a strong connection between that and Twinings, an age-old British tea company. I had originally wanted to put a watercolour paper texture to the design but as I mentioned in my last post it didn't print as well as the non-textured version, so I used matte paper to provide that slightly textured, well, texture.

Unfortunately I couldn't find a company to print this design off properly onto the travel mug, and those that I did find only provided a small square for my illustration. This is the reason why I've printed it off on paper and attached it onto the travel mug, but I do hope to find a company to do it for me one day. I think I fancy having this design myself, haha!

Conclusion
In conclusion, I really enjoyed this project for the fact that I wasn't trying to cram as much research into it, focusing more on my doodles and idea generation. I only researched on what I thought was appropriate for this project, doing it whenever I felt inspired and had to write it down. My final outcome was much better than I had original anticipated... So trying out new things isn't really a bad thing at all!


Update 17.01.14
I tweeted Steve Simpson and Linzie Hunter - the key inspirations for this project - and they both got back to me!


I am really happy to have gotten some feedback from two of my most inspirational designers, and it gives me more confidence in my design. I hope to continue down this path in future because I really enjoyed doing hand-lettering. 

Thursday, 9 January 2014

APP Words: Final Design

I'll probably develop this and place it on a mug prototype, but I thought that I'd leave this here just to remind me to put some photos up later on.

I'm really, really pleased with it's outcome, and surprised at myself... My vectors actually turned out okay! I've never really been that experienced in that field so I'm happy to see that it actually worked out okay in the end.


I printed out my designs on matte paper to provide that extra boost of texture, and after comparing two versions (one with the watercolour texture and one without) I went with the one that didn't have any texture applied. This is because the colours in the ampersand and banner were a lot brighter and stood out a lot more. It provided a very 'clean' and smooth appearance, something that relates to the soothing taste of tea.


Once chosen, I cut out my design and applied to my mug and... It fits perfectly! I am so glad that I did trim off the bottom slightly otherwise it would've been too long. I'll take better pictures later but here is a preview just for now:


APP Words: Sorting out the Details

[5] [6] [9]

Camouflage Problem
I now need to sort out that 'camouflage' connotation that kept cropping up whenever I looked at the tea leaves pattern, so I went back to the tea leaves document and using the sketch as reference I started to delete some of the leaves. 


I copied this square and went back to my mug document, pasting it on the side before reducing it so that it was the same size as the other pattern. I then created a swatch and changed the background.


I put the designs side-by-side to compare them both, and I much prefer the one that had the lesser amount of tea leaves. The leaves are more prominent because there's now more of a focus on the larger ones, so it doesn't resemble the camouflage pattern so much anymore. 


Tuesday, 7 January 2014

APP Words: Final Design Contin.

[4] [6] [8] [9]
One of the main focal points are the teapot, banner and cup, and it is necessary that the link between these is smooth to reflect the flow of tea from the pot so I created a new document to solely focus on that. I made the background green so that I could see everything clearly.
To try and do this link as smoothly as possible I created a smooth curve on a new layer. I used my sketch to help me out with this as well.


I used the paintbrush tool to try and make it a bit smoother, and it was a lot easier to draw the line with! I wish I discovered this function earlier. I just used the paintbrush to draw my line in the end.
That's when I realised that the paintbrush tool also had anchor points, so this should hopefully make it easier to draw the 'banner'. I ungrouped the Never Give In illustration and started to adjust it to match the line.


APP Words: Putting Everything Together

[6] [9]
I've finished all of the illustrations that I wanted to include, so now is just the case of putting them all together and then I could upload it into Photoshop to start adding texture and shading.

I am going to use the latest template - as that was the one that worked best, shown in this post - so I opened up all of the documents I needed, then put them together with the template document on separate layers. I deleted the old templates then saved it under a New Document so that I didn't lose anything.
Then I played around with all of the illustrations, scaling and arranging, before I came up with a layout I was satisfied with. I've left the colours for the Twinings label because I had the idea of including the logo on the teapot... Hmm.

As you can see, I decided to choose the most successful vote from when I gathered feedback from my peers. [4]


I tried to use the pattern but it doesn't seem to appear on this document, only in the tea leaves document, so I copied and the illustration next to the template and made a pattern by going onto Edit > Define Pattern. I then selected the template, and used the pattern as a fill colour. However it only showed the leaves and didn't have a background.


I tried out a little experiment where I filled in the pattern background with the same colour as the template background. I reduced the size of the pattern because the leaves were way too big. Adding a background colour didn't seem to work so I made it transparent. [4] [8]


The background of the template was still transparent even though the tea leaves pattern worked so I just duplicated the template, and on the duplicate I set the fill colour as the dark green. It worked! Result! I thought that the light green leaves were too light so chose a shade closer to the background. [4] [8]


Conclusion: [5]
It's nice to see everything coming together but I cannot help but think of an army camouflage when I glance at the background. I need to change something about it but I really cannot think what... Maybe I do need to make the tea leaves larger, or at least reduce the amount of them in a pattern.

So my next steps are:

  • Entwine the banner with the teapot and cup
  • Change the background pattern by reducing the amount of leaves in it
  • Add colours to Twining label
  • Convert everything to Photoshop


[n] Learning Outcome

Monday, 6 January 2014

APP Words: Template Prototype 2

[4] [5] [8] [9] 
Even though I already have a template drawn out I would need to do it on the computer and then print it out just to double check that the dimensions are correct. This is really important because everything could go horribly wrong; it isn't ideal to produce a design if it doesn't fit on a standard travel mug size!

I scanned in my sketch and started to trace around it using the pen tool. It was nice and easy to do as it was quite a simple shape, so this didn't take long at all. I then hid the sketch layer and printed the template out to wrap it around the mug.


It didn't fit as well as I hoped, and I thought it was probably better to actually base it off the costa design.


APP Words: Tea Leaves Pattern

[9]
Right, now it's time to (finally) produce the tea leaves pattern! I haven't really done many - if at all - patterns on the computer so I might learn something new today. 
Luckily I found quite a detailed tutorial (here) [4] to help me out with this, because even though I have roughly sketched my pattern I know that it wouldn't be ideal as everything needs to be placed perfectly so that it would repeat effortlessly. 

I first start off by uploading a photo of my pattern sketch and draw out vectors of all of the elements that I want within the pattern design. Once I was done I selected them all, copied them, and created a new document sized 600px x 600px. I then pasted them and shifted them to the side for a bit.


I used the rectangle tool to create a box by selecting it and then clicking anywhere on the screen, then I typed in the dimensions 300px x 300px. While it's still selected I went to View > Snap to Grid so that it'll be easier for me to place all of the tea leaves in, and put the box at the centre of the document. I locked this box. Then it was just the case of placing all of the tea leaves, taking reference from my sketch.


APP Words: Teacup and Teapot Vectors

It's near to the end of the deadline so I need to come up with all of the other sections as quickly as possible. After talking to my peers and my lecturers I decided to go along with the idea of incorporating the tea cup and pot as it was pointed out that they were very "British", and would create more of a connection with Twinings. [4]

I was quite surprised at this as I thought that my target audience would like this 'fun' illustration, but it appears that I was wrong!

My first thing that I wanted to do was then create a vector of my teapot and tea cup so that I could connect them with the banner design. I created a new document in Illustrator, uploaded a photo, and began to work.

I'm starting to get used to using the pen tool and creating vector images so this wasn't a very long process at all. I kept flicking between the pen tool and the shape tool to help me out with my design, and I often had to delete some anchor points to make curves smoother.
Therefore I've decided that instead of including detailed descriptions of every little step, I shall just upload these screenshots as they are pretty self explanatory and I have covered anything new in previous blog posts. [6]


APP Words: Colour Scheme Feedback

I decided to ask my peers and lecturers on what colour scheme really catches their attention by printing out all of the different versions onto one page, and having them tick their preferences. [7] These were my results:


I also asked a few of my peers what design they prefer, and also showed them my teapot and cup version. I was surprised once more when I learnt that they actually preferred that one!


Conclusion: [5]
I was quite surprised at the outcome as I thought they'd prefer the blue version, and although it was a strong choice it was overtaken by the green/yellow/orange version. Just shows how important it is to get feedback from both my target market and fellow designers! [4]
My next step is to carry on and design all of the little illustrations (the tea leaves pattern, teapot and teacup), put them all together and then change all of the colours. [8] Can't wait!

[n] - learning outcome

Sunday, 5 January 2014

APP Words: Feedback - Base Colours

I posted what I had so far on Behance and got some feedback off another graphic design student.

Image shown:


Feedback:


[4]
This confirmed my idea of installing some sort of old paper texture - maybe a similar texture to watercolour paper - and to include my more sketchier side for the shading. I don't know how I'm going to do this just yet so I'll be looking around for some tutorials. If all else fails, I'll just use my graphics tablet and do it in Photoshop. 

APP Words: Adding a Splash of Colour

[4]
With only my pattern design to do, I thought it was time to start figuring out what colours to use on my design. I'm going to thinking of the background as well as that'll be the main factor affecting the colours I choose on my "Never Give In" design.

As we've seen from a few posts back, this is what my design looks like right now:


Right, let's start adding some colour! I'm going to just show a whole series of different colours and put them all in one picture so that it'll be easier for me to compared everything.


APP Words: Twinings Label

[6] [9]

I want to get started on the other sections - the Twinings label and the pattern - as soon as possible so that I could slowly put all of the pieces together. I thought I'd tackle the label first because it will be challenging due to the serif type style.

Vector Version
The first thing I wanted to try out was drawing it straight from the sketch onto the computer, much like I did with my Never Give In design. However it didn't really turn out quite so well... The serifs went a bit crazy and clearly showed that this was my first time.


APP Words: Colour Schemes

Now is the perfect time to start figuring out colour combinations, but before I go onto kuler.adobe.com/ and randomly pick a combination I need to think of what kind of connotations and emotions that those colours would bring.

My design shall hopefully motivate the student and make them feel better about their day (especially if they're stuck on revising) so I would like to use colours associated with happiness as well as that hint of relaxation. I went onto Google to have a look at some websites and found one (http://www.colour-affects.co.uk/psychological-properties-of-colours) that had a whole list of the "main" colours and the positive and negative sides to them. Here's what I've copied and pasted from that site:

"RED. Physical

Positive: Physical courage, strength, warmth, energy, basic survival, 'fight or flight', stimulation, masculinity, excitement. 
Negative: Defiance, aggression, visual impact, strain.

BLUE. Intellectual.

Positive: Intelligence, communication, trust, efficiency, serenity, duty, logic, coolness, reflection, calm.
Negative: Coldness, aloofness, lack of emotion, unfriendliness.

YELLOW. Emotional

Positive: Optimism, confidence, self-esteem, extraversion, emotional strength, friendliness, creativity. 
Negative: Irrationality, fear, emotional fragility, depression, anxiety, suicide.

GREEN. Balance

Positive: Harmony, balance, refreshment, universal love, rest, restoration, reassurance, environmental awareness, equilibrium, peace. 
Negative: Boredom, stagnation, blandness, enervation.

VIOLET. Spiritual

Positive: Spiritual awareness, containment, vision, luxury, authenticity, truth, quality. 
Negative: Introversion, decadence, suppression, inferiority.

ORANGE.

Positive: Physical comfort, food, warmth, security, sensuality, passion, abundance, fun. 
Negative: Deprivation, frustration, frivolity, immaturity.

PINK.

Positive: Physical tranquillity, nurture, warmth, femininity, love, sexuality, survival of the species. 
Negative: Inhibition, emotional claustrophobia, emasculation, physical weakness.

GREY.

Positive: Psychological neutrality. 
Negative: Lack of confidence, dampness, depression, hibernation, lack of energy.

BLACK.

Positive: Sophistication, glamour, security, emotional safety, efficiency, substance. 
Negative: Oppression, coldness, menace, heaviness."

The best choices out of these colours - if I did want to go with the happy-but-relaxing idea - would be green, red, blue, yellow and orange. I would choose pink as well but that is stereotypically associated with feminine aspects and I want to produce a unisex design.

APP Words: Laying Down the Foundations

[6]

Three-Colour Palette
I still haven't figured out a colour scheme just yet, however I want to see what my design would look like with some colour on it so I chose three shades of grey. These three shades would then be the different shades of whatever colour I choose in the end, although I might make the darkest shade in a completely different colour. 

I drew three boxes and filled them in colours so that it'll be easier to fill the banner design in, as I just need to use the dropper tool to do so. I first filled in the colours for the banner -  I haven't yet incorporated what I've learnt from my experiments [6] - and then started to work on the ampersand.
For some sections they appear to be right at the back of the banner, so I just selected it to bring it to front. I then adjusted the parts that overlaps so that it looked like the ampersand is still going beneath the banner.


Saturday, 4 January 2014

APP Words: Experimentation

[4] [9]

After looking back at the design I had so far I figured out what was bugging me; I was creating a 3D type on a banner. I want it to look as if it was actually 'printed' on the banner, and the 3D effect just made it look weird.

I had a browse at some tutorials online so I can try a bit of experimentation with my design. Plus I'll definitely be learning something new! It's a win-win situation.

Scribble Typeface
I took reference from this tutorial here. I first copied and pasted my design so far and brought it over so that it was on the side of the document, then deleted all of the shadows.


I then thought that it'll be easier to do this experiment on a new document so I created one and started to work on there.
I selected one of the letters - N - and took off it's fill. I then went onto the Appearance panel and clicked "Add New Fill", and it automatically chose black.


APP Words: Author's Signature

[8]

One of the things I mentioned on my previous post was that I needed to add a little signature of the author's name, so I spent a while just sketching out different signature styles before finally deciding that I'll place this on the bottom of the ampersand. I had this idea in mind for a while but actually seeing it confirmed this placement choice.


Friday, 3 January 2014

APP Words: Working on the Final Design - Never Give In Illustration

[6] [9]

I wanted to work my "Never Give In and Never Give Up" design on Illustrator as I wait for my Inkling to charge, in hopes of improving my vector skills. I looked back at Leslie Carbarga's book "Logo, Font and Lettering Bible" to refresh my knowledge a bit about some of their tools.

As I'm going to be drawing up a vector I didn't have to scan a perfect image of my design, so I just took a photo on my phone and uploaded it on Illustrator. I'm not too sure how to draw up the template just yet so I just created an A4 document (as it isn't larger than A4) and started working on it. 
I reduce the opacity of the sketch to around 35%, created a new layer for the line work, and then locked my sketch layer. 


APP Words: Working on the Final Design

I can finally make steps towards my final design, so the first thing I did was look through my pictures of tea leaves from my Pinterest board "Tea" and did a small drawing, trying to figure out how to do it so that it's like a pattern. I'm going to develop this further in Illustrator as they have an option on how to do patterns (but I need to look at some tutorials first!)


Then I had a look at the Twinings logo and after writing down some notes I tried my hand at drawing it. It went surprisingly successfully, although I'm worried that the type wouldn't work well at a small scale because of how tall the characters are.  


Thursday, 2 January 2014

APP Words: Design Development - Teapot & Cup Design

After uploading my two designs I had (which you can see in this post) I was surprised to hear that most of my target market preferred the 'plain' design, saying that the elements of the other one distracted them from the "Never Give In and Never Give Up" illustration. After having a little think about it I've decided to follow their opinions because I realised that the other design might be a bit too "fun" for Twinings. Their designs are usually quite minimalist and sophisticated, especially in terms of illustration, so maybe a minimalist travel mug design might be best for them. [1]

I want to try out my idea again but with a slightly different design. As I was drinking some tea I thought of how tea could flow down the design and form the 'banner' of the Never Give In and Never Give Up. I used my board "Tea" as inspiration. 


I quite liked the look of this idea, and so took it across to a landscape orientation so that I could see what it would actually look like (or near enough) as a travel mug design. After that I made some small annotations on what could be adjusted. 


Conclusion:
Even though I quite like this idea I'm still unsure of whether or not it'll be suitable for Twinings, so what I'll do is carry on with the "plain" version, do it all up on Illustrator, and then figure out what to do next. It'll be easier to just add in a teapot and teacup if I did the plain version first after gathering some more feedback from my colleagues and target market and will be a lot quicker that way. This is because if I do draw from this sketch then... What if my target audience didn't like it? I'd have to try and adapt it onto it's own. It's definitely easier adding then taking away. [1]

[n] Learning Outcome