
Photo Stock | mjranum-stock on DeviantART
 So I first downloaded the stock provided that I thought was suitable for a grunge effect in Photoshop, and duplicated the background layer. This is because I was going to do lots of editing on it so I didn't want to ruin the original image in case I went wrong. I called this duplicate "Grunge".
Next I went onto Filter > Distort > Ripple to create that kind of flowly grunge effect that basically is the foundation for this image. I wanted to make the ripples quite large so I set it at large instead of medium, and at 999%.

To roughen the edges I went onto Filter > Stylize > Diffuse.

Now I want to soften them ever so slightly by going onto Filter > Blur > Gaussian Blur, setting it at 0.5%.

To randomise the mess I went onto Filter > Brush Strokes > Spatter and just left it as it was already set.

This is what it looks like so far:

some of the woman's features. So by selecting this Layer Mask I chose a soft round brush in a black colour and went over her main features.


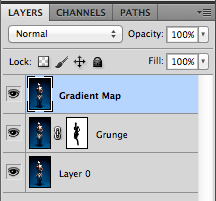
I created a new layer called Gradient Map, and on this new layer I went to Image > Apply Image. This duplicates everything onto the new layer. I just left it as it was and pressed OK.
By going onto Image > Adjustments > Gradient Map I chose the black & white gradient, and set the layer mode to Darken.


I create a new layer called Channel Mixer to adjust the colours, and used the Apply Image method. Going onto Image > Adjustments > Selective Colour I tinkered around with different colour values.


And voila! This was the final result!

Conclusion: I learnt a lot more from this tutorial; in fact, almost every step was new to me apart from how to add a mask and using the mask tool. I am quite intrigued with playing around with the different distort tools... Might try and have another go later!
No comments:
Post a Comment